Create Azure Logic App Using SQL Connectors
In BizTalk Server, SQL Adapter is the main component in order to communicate with the SQL Server. On the other hand, In Logic App we use the connector to communicate with the SQL server. In this tutorial, we will create a table in SQL Azure and perform read and write operations using the logic app.
Pre-requisites:
- Azure subscription, if you don’t have a subscription, you can start with the free subscription here.
- Get Your Free Beginner’s Logic Apps Training Guide
Create a table in SQL Azure:
- Login to Azure Portal.
- Click on SQL Database > Add.
- Enter a database name and select your subscription and resource group. Select Source as a Blank Database and click on Server. A new section named “Server” would appear. Click on Create a new Server or you can select an existing server.
- In case of a New Server, Enter any name in the Server name field and Server admin login field. Type any password and click on select. Please remember these credentials for now.
- Enter on Create button a new database would be created

- Click on your database > Overview > Tools > Query editor(Preview) and execute the following query in the query window.
CREATE TABLE ingredient ( ingredients INT primary key IDENTITY(1,1) NOT NULL,
ingredientName VARCHAR(50) NOT NULL,
ingredient price INT NOT NULL
);
INSERT INTO ingredient
( ingredientName, ingredientPrice)
VALUES
(‘Beef’, 3),
(‘Mango’, 2),
(‘Cheese’, 4);
Note: If you are unable to the execute query then click on Login at the top of the query window and provide your credentials which we created earlier.
Create another table with the same structure. So we can dump data from the ingredient table to a new table.
Limitations:
The table must have an Identity column.
Logic App to import data from one table to another table:
- Go to the Azure portal again.
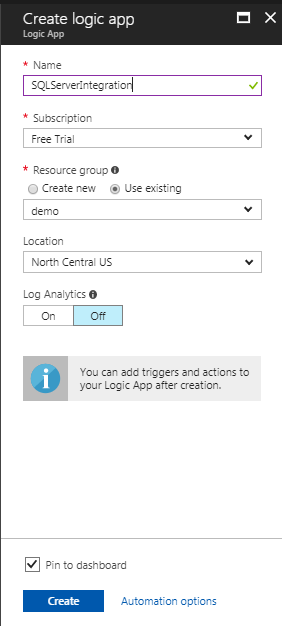
- From the left azure menu, choose New > Enterprise Integration> Logic App.
- Add your Logic App name and select your subscription. Add new or use existing resource groups. Resource group helps you to manage all the related resources in one resource group. Mark the pin to the dashboard if you want and click on create.
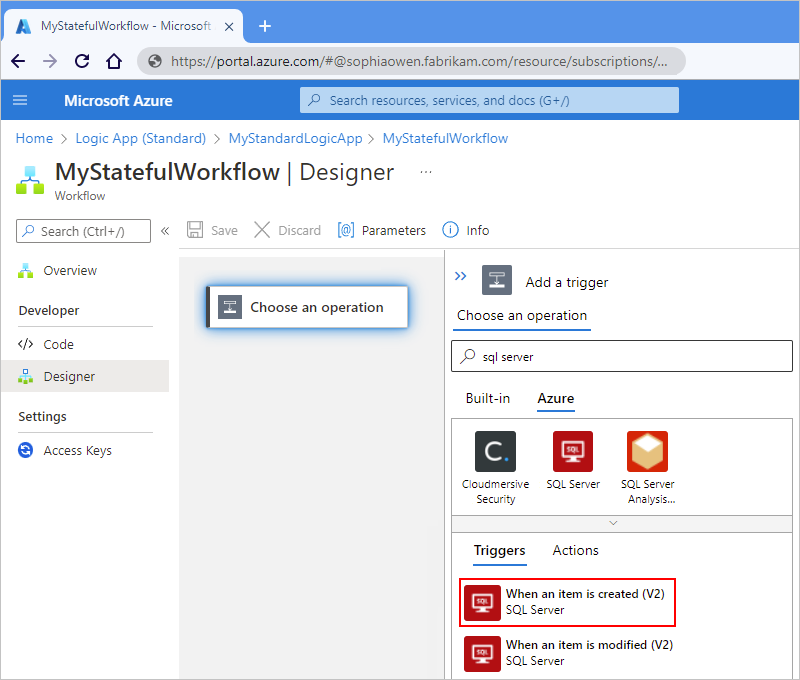
- Select a blank logic app from the templates.
- Type SQL as a filter in the search box and select SQL Server – When an item is created
- If you are not connected already, click on Manually enter connection information. Enter all the connection information like undermentioned in the figure.
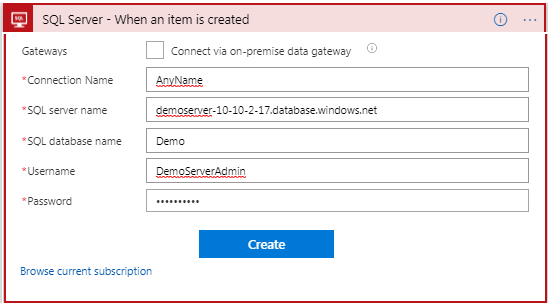
- Connection Name is just like connection string name. You can use the same connection in other logic apps.
- Once you entered the information, click on the create button.
- Now choose an action to dump data to a new table. At the bottom of the trigger, choose + New Step > Add an action.
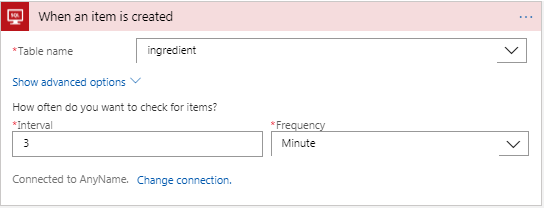
- Provide the table name, and set the interval and frequency for recurrence. In the screenshot, I have set an interval of three minutes.

- Type SQL as filter again, and select SQL Server – Insert row from the action list.
- Select table name. All table columns would be shown as text boxes.
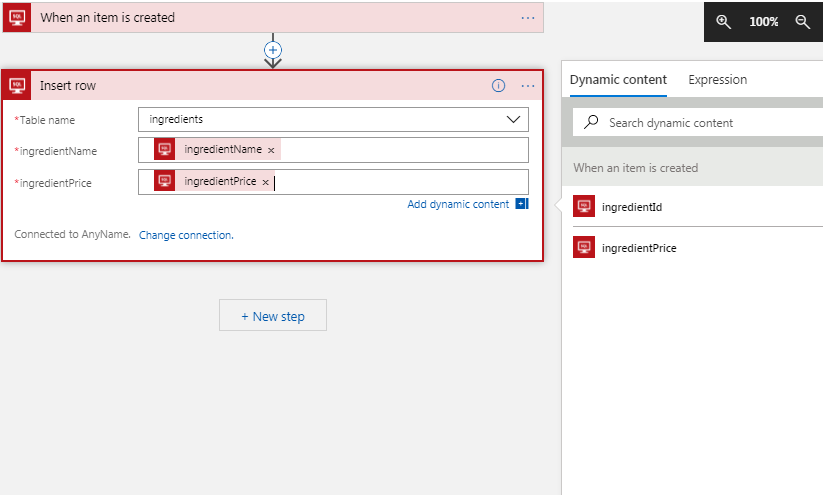
- Set value to text boxes, you can add static or dynamic values from previous actions.
- Now you can run this Logic App.
Related Posts
 The benefits of an integrated supply chain to the wholesale industry
 Peopleware Demo Video
![[Infographic + New Post] Introduction to the Internet of Things](https://alliedc.com/wp-content/uploads/2015/03/IoT-Info-2-150x150.png) [Infographic + New Post] Introduction to the Internet of Things
[Infographic + New Post] Introduction to the Internet of Things![SharePoint Training for ASP.NET Developers [Text]](https://alliedc.com/wp-content/uploads/2015/05/MSFT-SharePoint-150x150.png) SharePoint Training for ASP.NET Developers [Text]
SharePoint Training for ASP.NET Developers [Text] Cloud vs. SaaS Applications: What’s the Key to Your Digital Success?
 Power Monitoring – Allied Consultants – IoT home automation